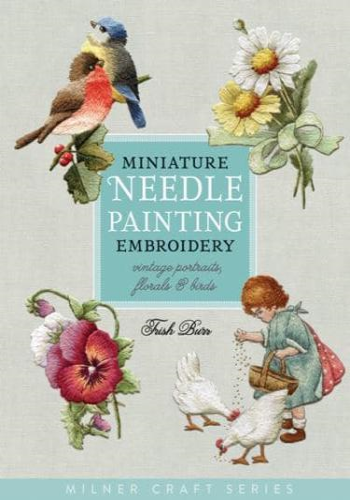
Trish has always been fascinated by miniature art and for years has had a yen to try and embroider smaller pieces, there is something so endearing about little paintings with all the detail and form of a larger piece, not to mention the fact that they are much quicker to stitch!
When Trish sat down to consider ideas for this book, she wanted not only something that provided a good choice, with lots of projects, but also to ensure that each project was worthy of stitching. The designs needed to be fresh and appealing, to depict the pretty, romantic illustrations typical of the Victorian and post-Victorian eras.
Teaching embroidery has helped Trish to understand the need for clarity in both the technique and project instructions, so instructions on everything about long and short stitch and how to adapt it to fit different situations and projects have been provided.
Each project is accompanied by a detailed thread diagram which shows exactly which colour should be used and where. The small size of the designs allows for great flexibility in their final use-such as group framing, making up into cushions, book covers, quilt squares, needle cases, box lids, tote bags, pockets on clothing and so on.
Following the portraits, birds and flowers, a section with much smaller Victorian pansies and buds, again with thread diagrams has been added. These projects are mini designs that could be useful for quick gift ideas, as trade cards to swap, stitched onto name cards or grouped in a frame. They would also look lovely on little needlework items such as a needle case, pincushion or the cover of an embroidery notebook. The pansy flowers could be used on the front of the needle case and the bud on the back.
A 'shopping list' of all the threads needed for each project appears as a thread chart with each project. Charts for equating Anchor and DMC colours appear near the end of the book, and Anchor and DMC thread suppliers are listed under Suppliers at the end.
